Getting Started
Complete step-by-step tutorial for getting started with GitButler, from importing repositories to managing multiple branches and commits.
Here is a quick overview of how to get started with GitButler. In this guide, we will:
- Get setup and start working with a local repository
- Do work and commit on several branches simultaneously
- Push your work to a remote repository and get it integrated
- Reorder and edit your commits
- Undo anything
Importing a Local Repository
After downloading and installing GitButler, you will be greeted with the welcome screen. From here you can import or clone a repository.
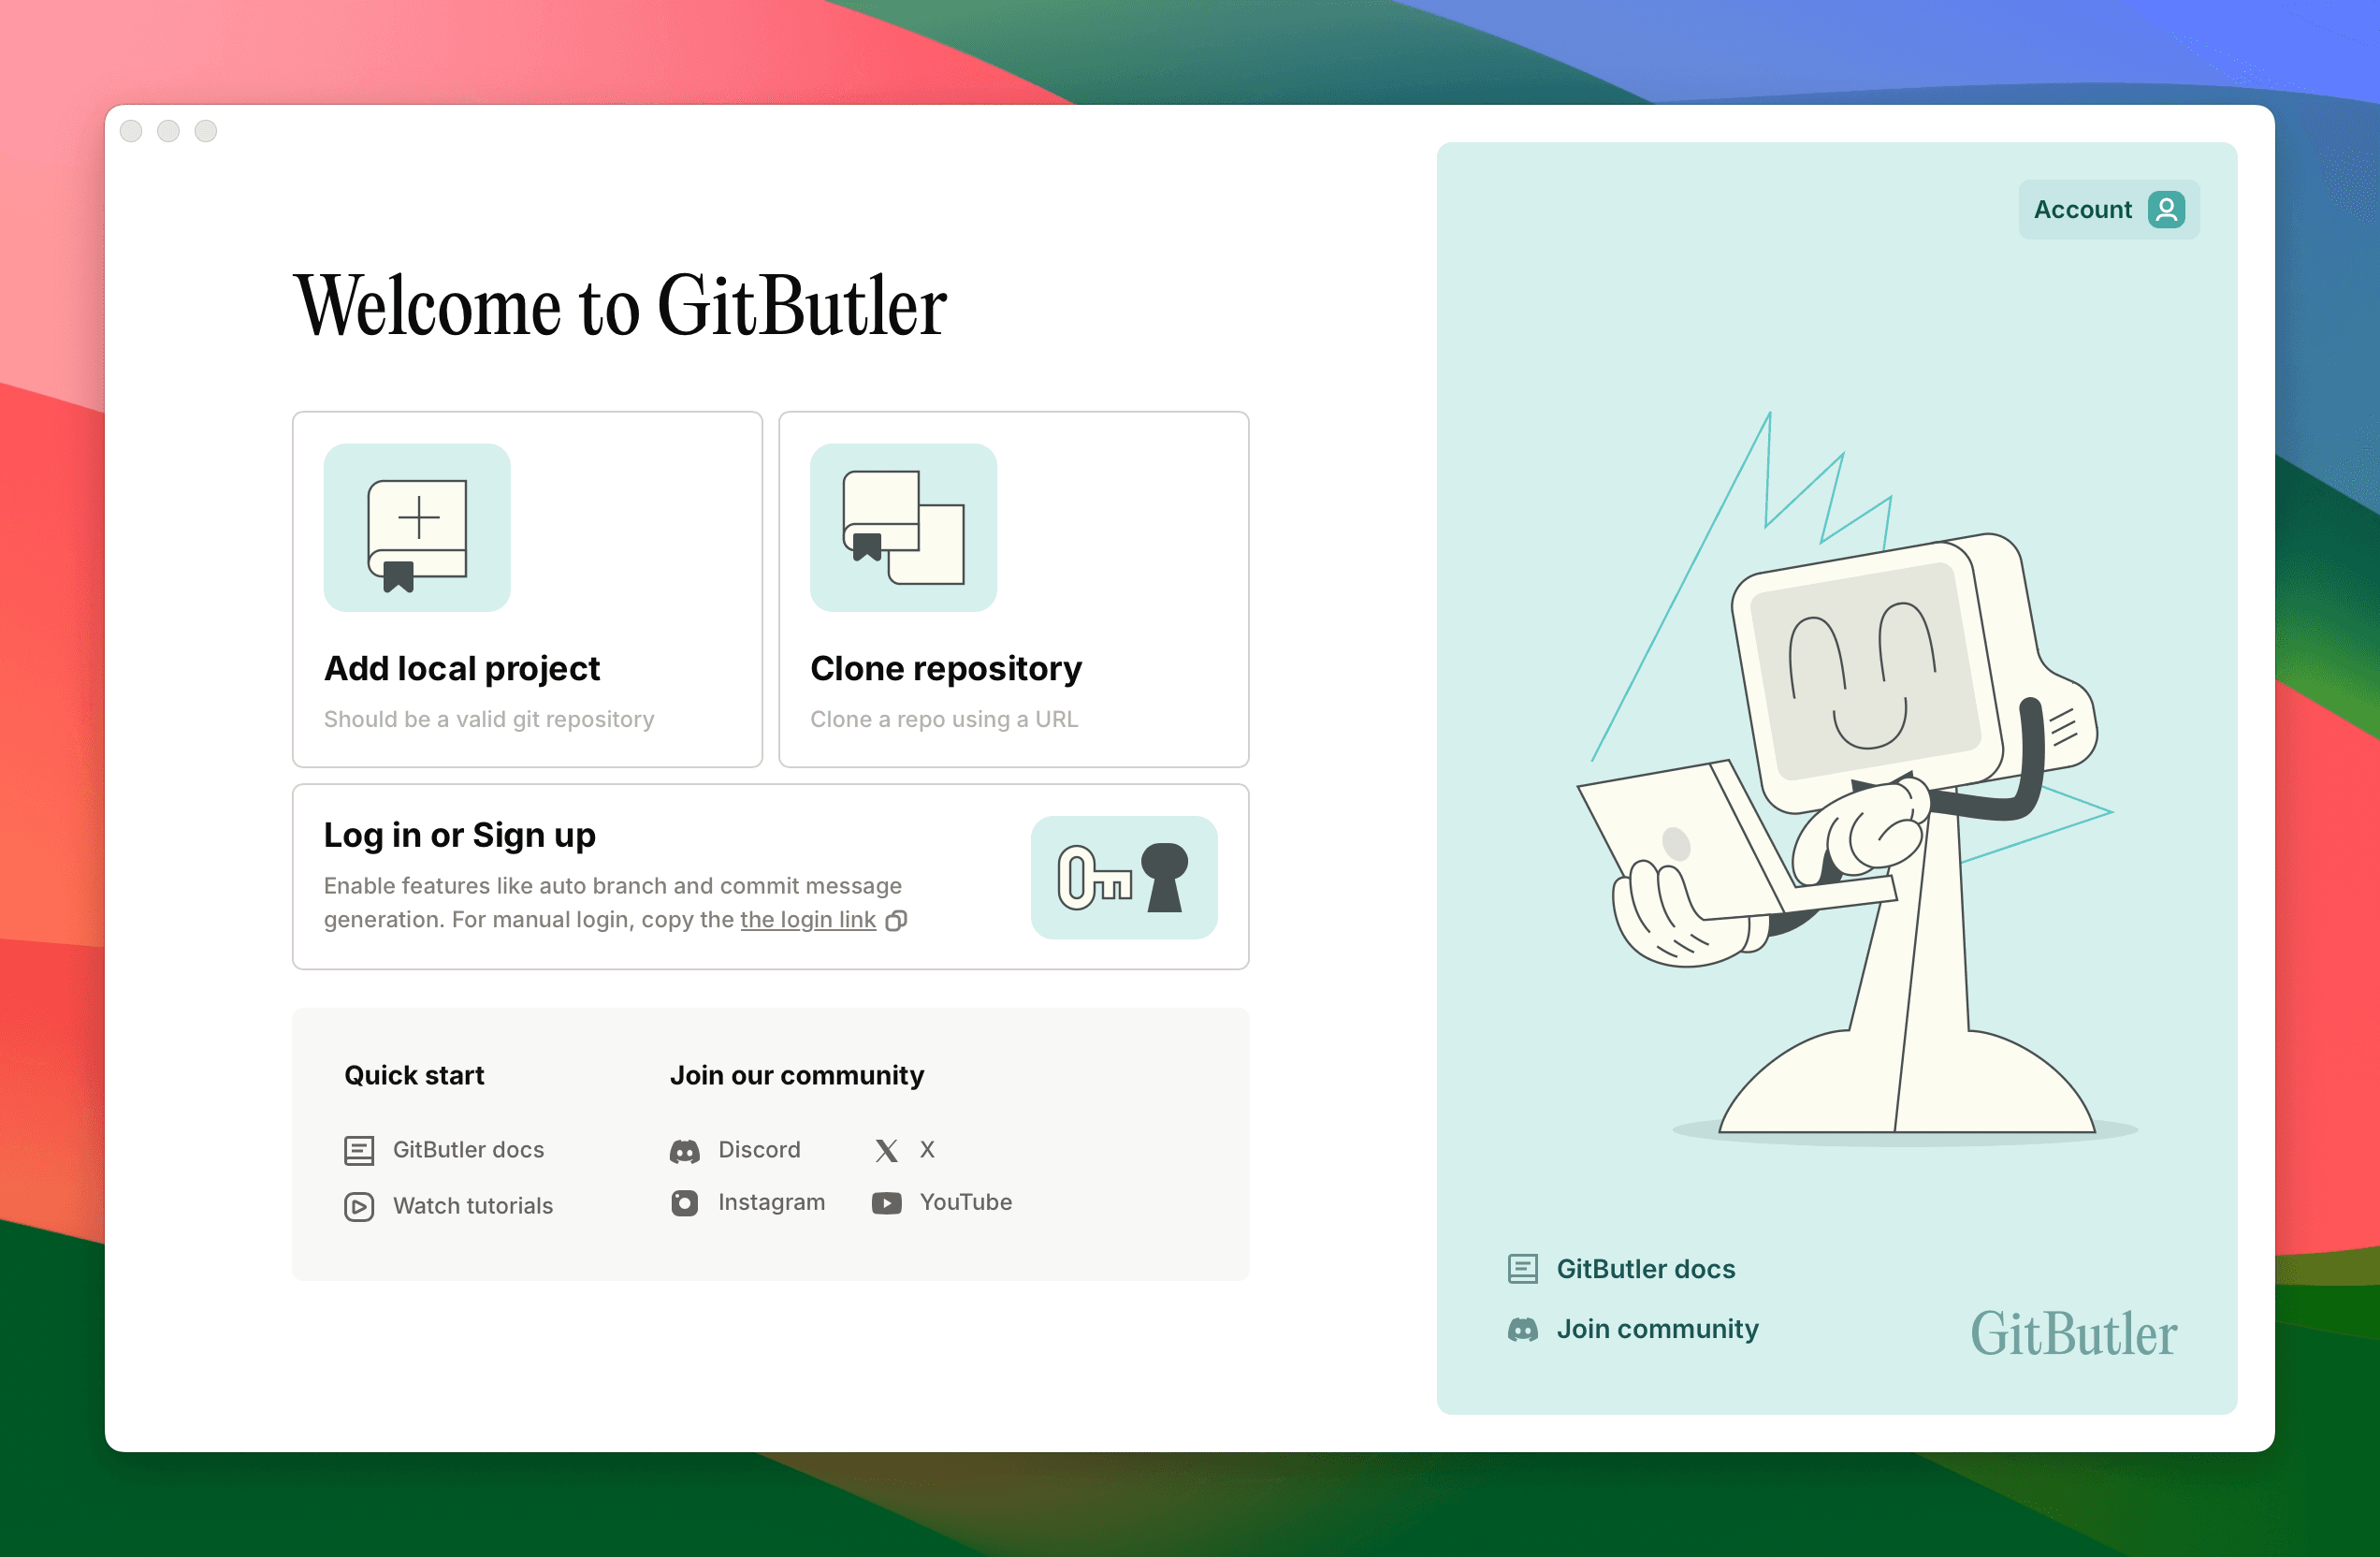
Let's start by importing an existing Git project on your machine. If you click "Add local project" and then choose the directory of the existing Git initialized project, then we will start the import process.
Choosing a Target Branch
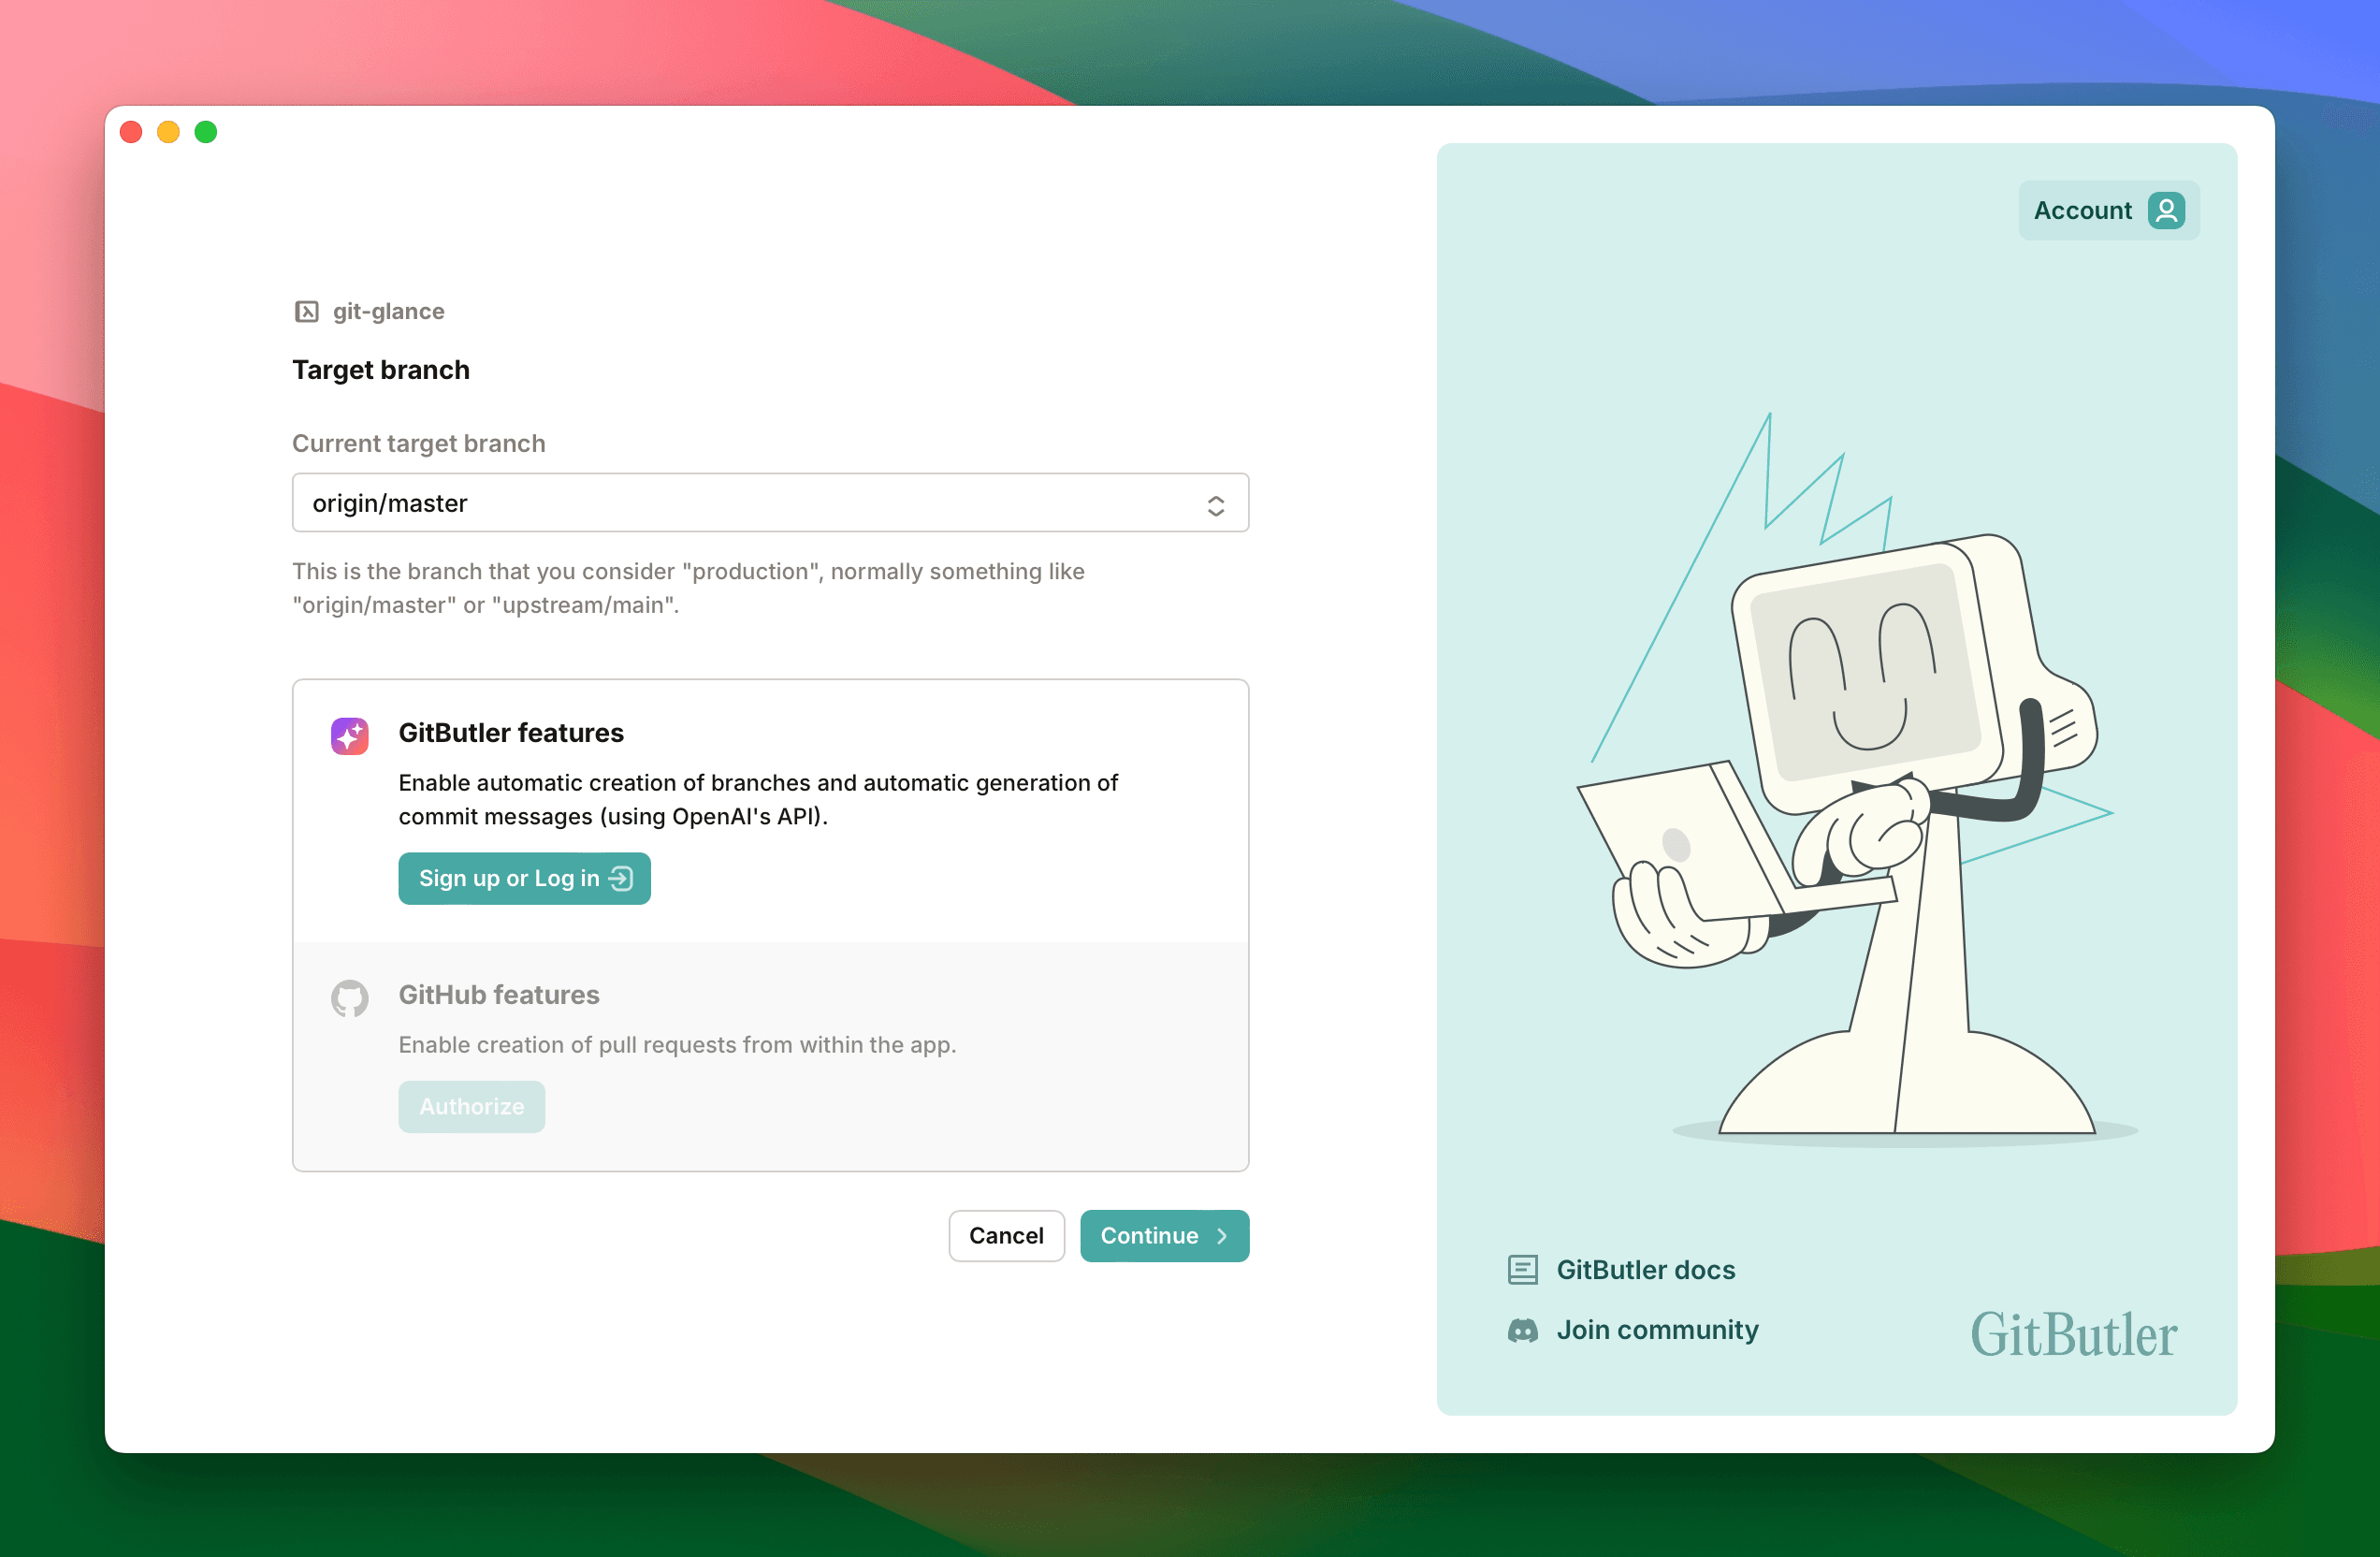
The first step is to choose your "target" branch. GitButler focuses on a trunk based development model, so first you need to tell us what branch means "production" to you. Normally this is something like origin/master or origin/main.
If you would like to use our AI features like commit message generation, you can also sign up for a GitButler account and log in. This is optional, but we'll do it here so we can show off these features.
You can also connect GitButler to your GitHub account so we can automatically open Pull Requests for you (this is also optional).
Set Up Git Authentication
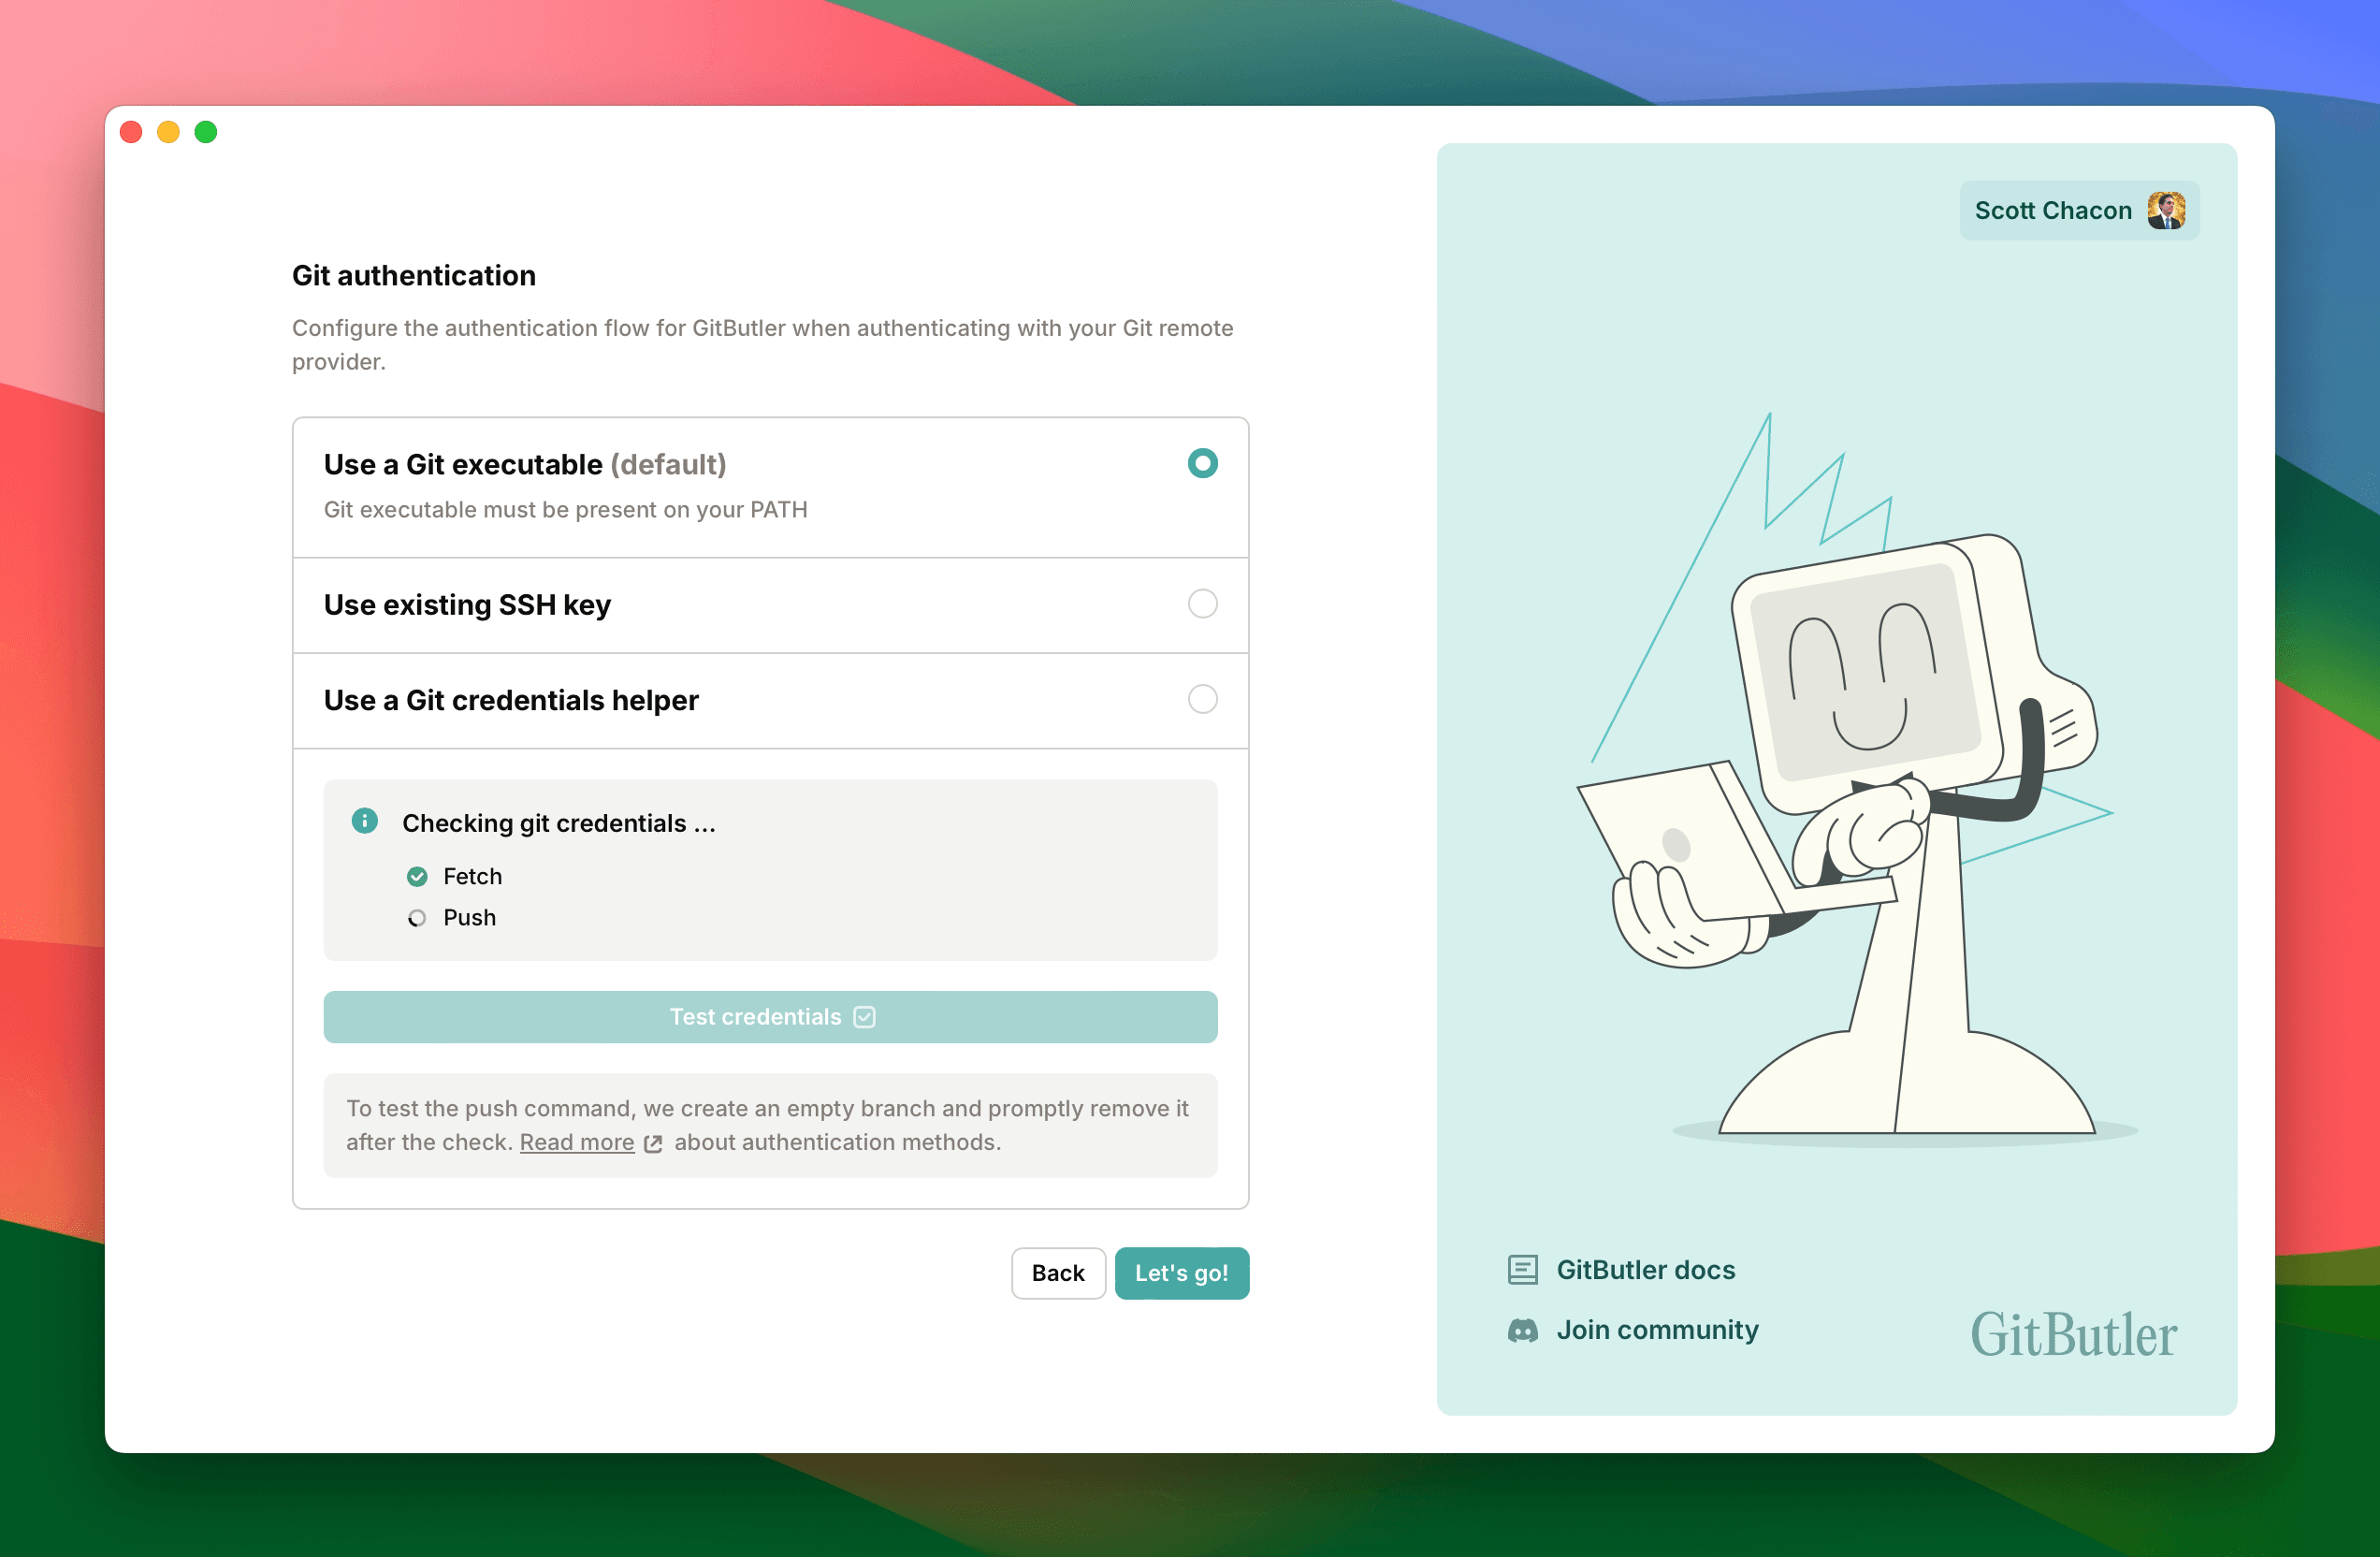
In order to push to a remote repository, you will need to set up your Git authentication. We provide three ways to do this, but generally it's easiest to use the existing Git executable. You can hit the "Test credentials" button to make sure everything is working properly.
Ready to Go
Ok, now we're all setup and you should see our main working screen. If you had a branch with some work in progress, you should see it imported already. Otherwise, you will see a blank workspace with no branches applied.

Do Some Work
Now we can start working. GitButler will watch your working directory and immediately show any changes that you make.
In the above case, we can see that there are some changes to the README.md file. Let's create a new branch and commit our changes to it. You can click the "Create Branch" button in the workspace, or the "Commit to new branch" button below the Unassigned changes.

You can click on any file to see what the diff is.

Now that you have a branch, you can simply hit the "Start a Commit" button on the branch you want to commit to, then either write your commit message, or hit "Generate Message" to let AI look at the diffs and write a message for you.

Once you've done that, you should see something like this:

Split secondary work into a new branch
Now let's say we decide to add a new feature and don't want it to depend on our README change. Instead of stashing the changes and doing that, or committing unrelated work into the branch I'm on, I can simply create a new parallel branch, drag my work over there and commit there.

Now both branches are applied, but I can commit to them independently and push them to a remote repository at different times.
Integrate Your Work
Since the README updating branch is ready to be merged, I can push that branch up, open a Pull Request on it and wait for it to be integrated, while I continue to work on and commit to my other feature branch.

Now we have a series of commits on our feature branch, which we've continued to work on while we're waiting for our README update to be integrated.
GitButler sees that our target branch has new work and shows us the "Update" button, which we can click to rebase our feature branch on top of the new work and also remove the README branch automatically, since we can see that it has been integrated upstream.

Reorder and Edit Your Commits
GitButler makes it very easy to edit, reorder, squash and split commits. If you hover over any commit, you will see a drag handle on the top right. You can drag the commit to reorder it, or drag it on top of another commit to squash them together.

To split a commit, you can insert an "empty" commit in between the two commits you want to split, then drag the changes from the commit you want to split into the empty commit.

Now you can drag the changes from the commit you want to split into the new empty commit.

Finally, you can edit the commit message of the previously empty commit to give it a meaningful message, and now you have split the original commit into two separate commits.

You can also uncommit any commit without dependencies, or even individual files in a commit.

All of this makes it very easy to build up and maintain a nice, clean history that is easy to understand and work with.
Unapply a stack
If you decide you don't want to work on a branch anymore, you can simply unapply it. This will remove all the changes from that branch from your working directory, but keep the branch around in case you want to reapply it later.

Undo Anything
If at any time, you do something you didn't mean to do, you can always undo it. You can undo a commit, a commit edit, a squash, an upstream update, a branch application, anything.
To do this, click the "Operations History" button in the sidebar, find the action you want to rewind to and hit the "Revert" button.

Last updated on